Mastering the Art of Edentulous Impressions with Massad Trays
Creating an accurate impression for an edentulous patient is the foundation of a well-fitting, comfortable denture. If you've struggled with achieving precise results, Dr. Joseph Massad's impression technique might be a game-changer for your practice. Using the Massad Edentulous Low Temp Impression Trays, you can capture detailed anatomical features with ease, improving patient comfort and prosthetic outcomes. Let’s break down the process step by step.
Why Choose Massad Edentulous Impression Trays?
Unlike standard trays, which often require multiple adjustments, Massad trays are thermoplastic and easily moldable, ensuring a custom fit for each patient. Here’s what makes them stand out:
✅ Custom Adaptation – The tray softens in hot water, allowing it to conform to the patient's anatomy, reducing the need for excessive adjustments.
✅ Anatomically Designed – Built with low vestibular borders and muscle release areas to capture all essential details.
✅ Time-Saving – The design enables clinicians to combine preliminary and final impressions in one step, cutting down chair time.
Step-by-Step Guide to the Massad Impression Technique
1. Selecting and Adapting the Tray
-
Choose the right-sized Massad tray for your patient’s arch.
-
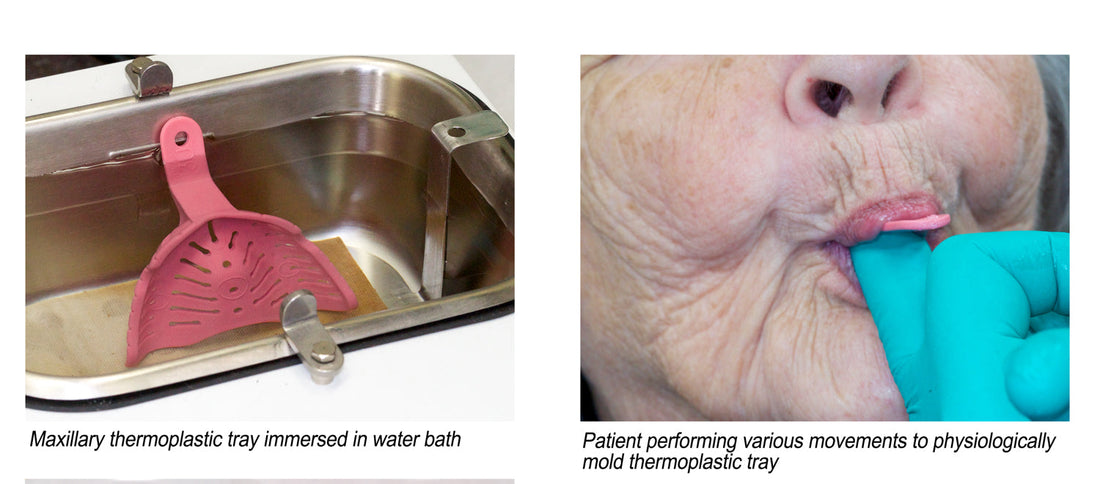
Soften it in hot water until it becomes pliable.
-
Insert the tray and gently mold it to fit the patient’s edentulous ridge, ensuring proper adaptation.
2. Creating Tissue Stops
-
Apply high-viscosity PVS impression material in key areas to form tissue stops, preventing over-seating and ensuring a stable fit.
3. Border Molding for a Functional Fit
-
Add high-viscosity PVS along the tray borders.
-
Insert the tray and instruct the patient to smile, pucker, and move their tongue to capture natural muscle movements.
-
This step ensures a highly functional denture with proper peripheral seal.
4. Final Wash Impression – The Precision Touch
-
Apply low-viscosity PVS over the entire tray.
-
Carefully seat the tray using the tissue stops as a guide.
-
Hold it steady while the material sets, capturing every fine detail.
The Result? A More Precise, Comfortable Fit!
By following these steps, you’ll achieve impressions that improve denture stability, reduce sore spots, and enhance overall patient satisfaction. The Massad tray’s innovative design makes the process smoother, faster, and more predictable.
Want to see this technique in action? Check out at 15 minute walkthrough here: Massad Edentulous Impression Tray
Final Thoughts
A well-fitting denture starts with a great impression, and the Massad Edentulous Low Temp Impression Trays make that easier than ever. Whether you’re a seasoned clinician or new to prosthodontics, this technique can elevate your patient care and clinical efficiency. Give it a try and experience the difference!
Have you used Massad trays before?
